Tutorials
A tour of the First Take editor
Every part of the app, numbered and named: the workspace, steps, assistant, viewer, timeline and inspector.
First Take team · 12 Oct 2026 · 8 min read
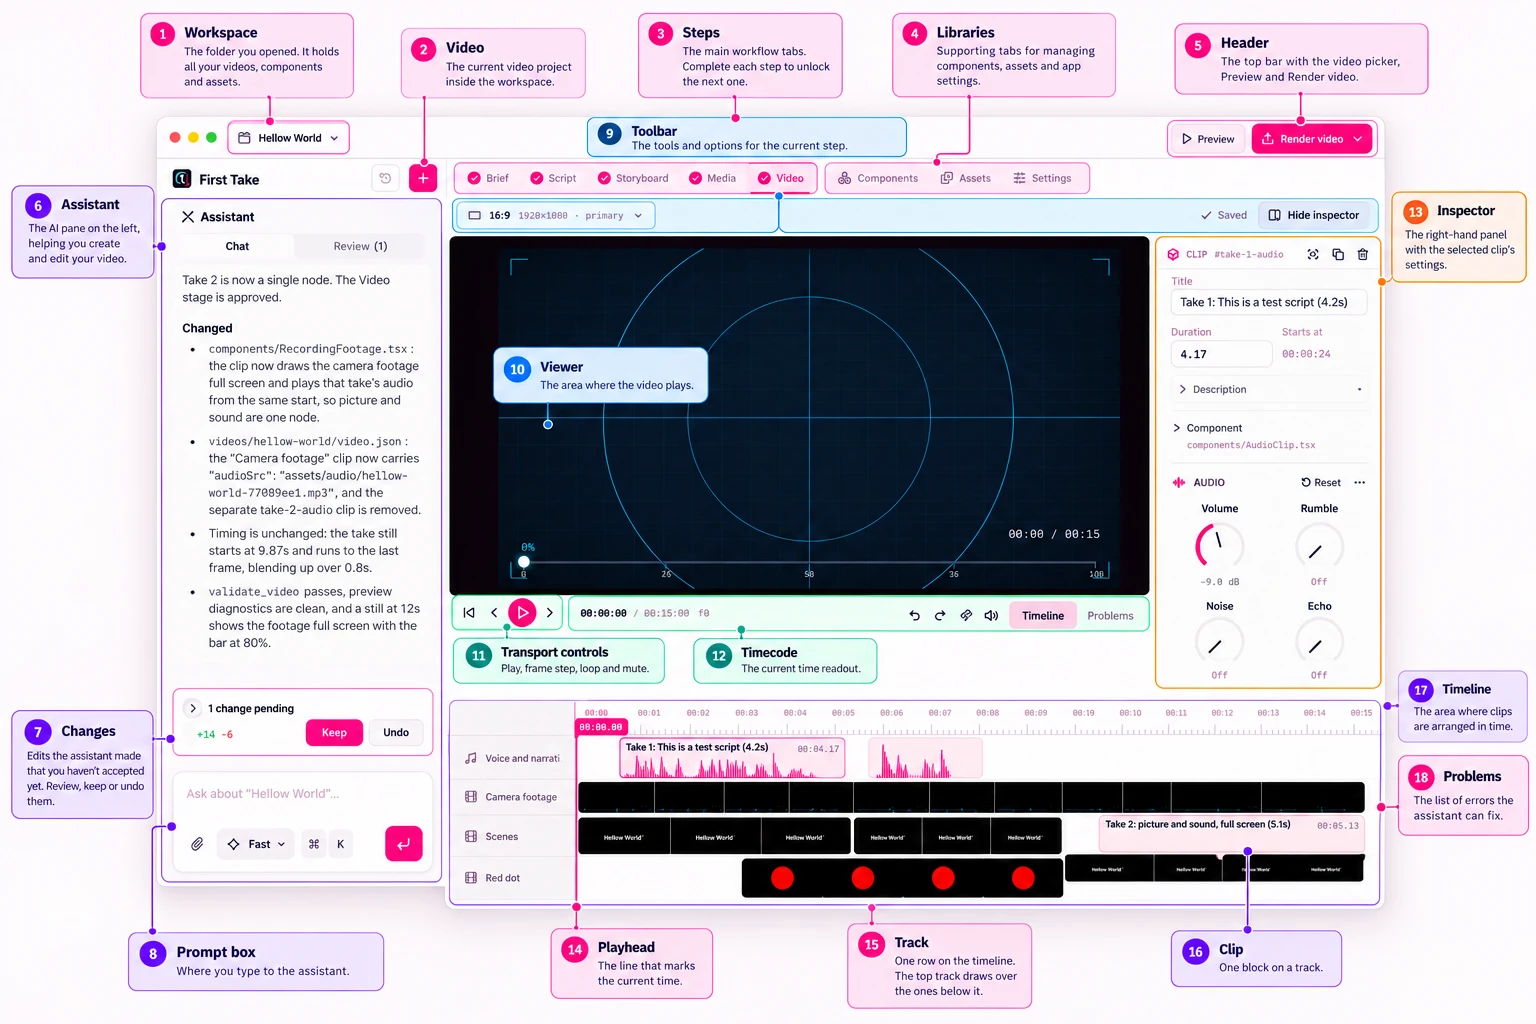
If you've used a video editor before, most of First Take will feel familiar. If you haven't, this is the map. Each part of the app has one name, and we use the same names in the app, in our help, and when the assistant talks to you.
The pictures are numbered. Each card below uses that same number, then the name of the part, then what it's for.
Around the app
These five frame the window. They tell you which folder you're in, which video is open, and where you are in the work.
Workspace
The folder you opened. It holds your videos, components and assets as ordinary files, so you can back them up, share the folder, or leave a project for months and pick it up again.
Video
The video open inside this workspace. A workspace can hold as many as you like, and they share components and assets, so a title card you build once is there for the next video too.
Steps
The main workflow tabs: Brief, Script, Storyboard, Media and Video. You approve each step to unlock the next, which keeps a wrong turn in the script from turning into media you'll throw away.
Libraries
The supporting tabs after the steps: Components, Assets and Settings. Steps are the video you're making. Libraries are the building blocks and preferences those steps draw on.
Header
The bar across the top. The video picker lives here, with Preview and Render video. Rendering doesn't use credits, so you can export as many versions and formats as you need.
The assistant
The pane on the left is a conversation. The assistant drafts, builds and fixes things by editing the real files in your workspace, and nothing it changes is final until you keep it.
Assistant
The AI pane. Ask it to draft the script, plan the storyboard, build a component or fix a problem. Chat is the conversation. Review is where you look through what it changed.
Changes
Edits the assistant has made that you haven't accepted yet. They show up in place, so you can judge them in the video. Keep what you like, undo what you don't, or open Review and take them one at a time.
Prompt box
Where you type. Attach a file if the assistant should see it, and choose how much thinking to spend: Fast for everyday edits, a higher tier when the job is fiddlier.
The editor
The Video step is where the scenes, narration and music come together. The viewer sits in the middle, the timeline under it, and the inspector to the right.
Playing the video
The picture, and the controls along its edge.
Toolbar
The bar at the top of every tab. On Video it shows the format you're previewing, whether the work is saved, and the control that shows or hides the inspector.
Viewer
Where the video plays. The stage stays dark in both light and dark mode, so the colour you're judging isn't tinted by the rest of the app.
Transport controls
Play, step one frame back or forward, loop and mute. They sit on the viewer, and the same set appears again on the timeline.
Timecode
Where the playhead is, and how long the video runs. On the viewer it reads as the current time beside the total duration.
The timeline and the inspector
Everything under and beside the picture: the selected clip's settings, and the tracks the video is built from.
Inspector
The panel on the right, filled with the selected clip's settings. Hide it from the toolbar when you want the viewer to take the width.
Playhead
The vertical line that marks the current time. Drag it along the ruler to scrub. Everything to its left has already played.
Track
One row on the timeline. Narration, footage, scenes, graphics and effects each get a row, and the top track is drawn over the ones below it.
Clip
One block on a track: a piece of narration, a component, a scene or a video clip. Select it and the inspector switches to that clip.
Timeline
The area where clips are laid out in time. Switch to it from the bar under the viewer, next to Problems.
Problems
The list of errors, such as a component that won't compile or a file that's missing. Open it beside Timeline, then ask the assistant to fix what's there.
A closer look at the timeline
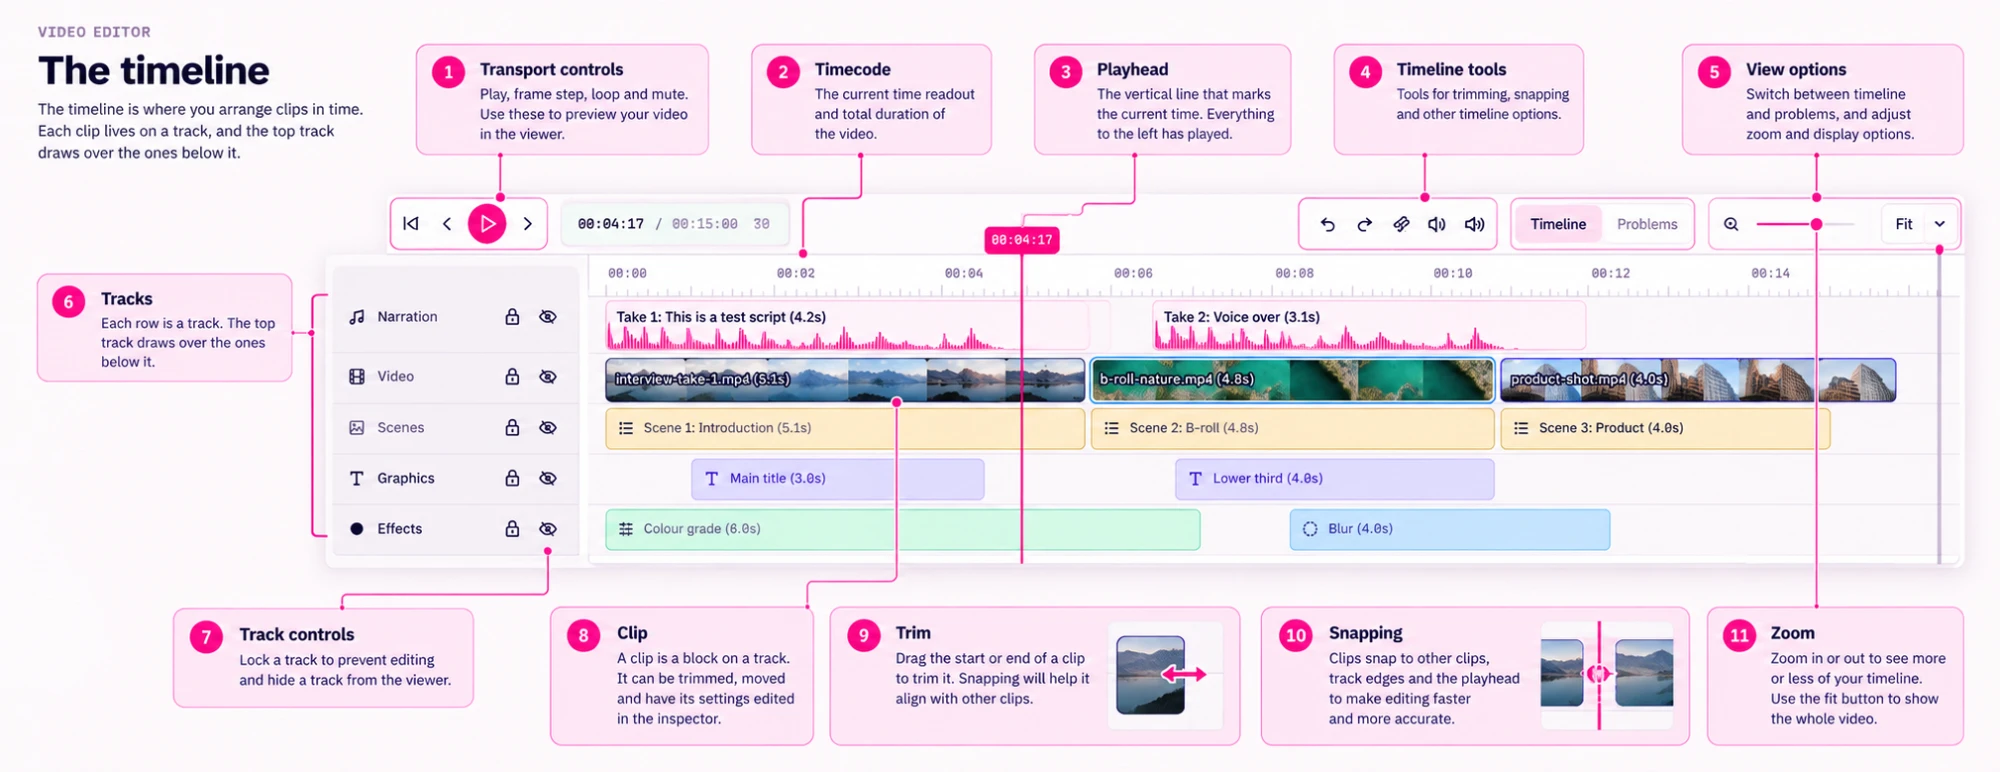
The timeline is where you arrange clips in time. Each clip lives on a track, and the top track draws over the ones below it. The numbers on this picture start again at 1.
Getting around
Play, scrub and zoom, before you move a clip.
Transport controls
Play, step a frame, loop and mute, so you can check the edit in the viewer without leaving the timeline.
Timecode
The current time, and the total length beside it. The same readout sits on the viewer.
Playhead
The vertical line marking the current time. Drag it to scrub. Everything to its left has played.
Timeline tools
Undo and redo, snapping, and the other tools for working on the timeline. Snapping is the one you'll leave on most of the time.
View options
Switch between Timeline and Problems, zoom in or out, and Fit the whole video into the window.
Tracks and clips
The rows themselves, and the edits you make to a clip.
Tracks
Each row is a track, such as Narration, Video, Scenes, Graphics or Effects. The top track draws over the ones below it.
Track controls
Lock a track so it can't be edited by accident, or hide it so it drops out of the viewer. Both controls sit at the left of the row.
Clip
A block on a track. Move it along the time, trim either end, or select it and change its settings in the inspector.
Trim
Drag the start or end of a clip to shorten or lengthen it. With snapping on, the new edge lands on another clip or the playhead.
Snapping
Clips snap to other clips, to the edges of a track and to the playhead. Lining a cut up gets quicker, and more precise.
Zoom
Zoom in to place a cut on a frame, or out to see more of the video. Fit shows the whole video at once.
A closer look at the inspector
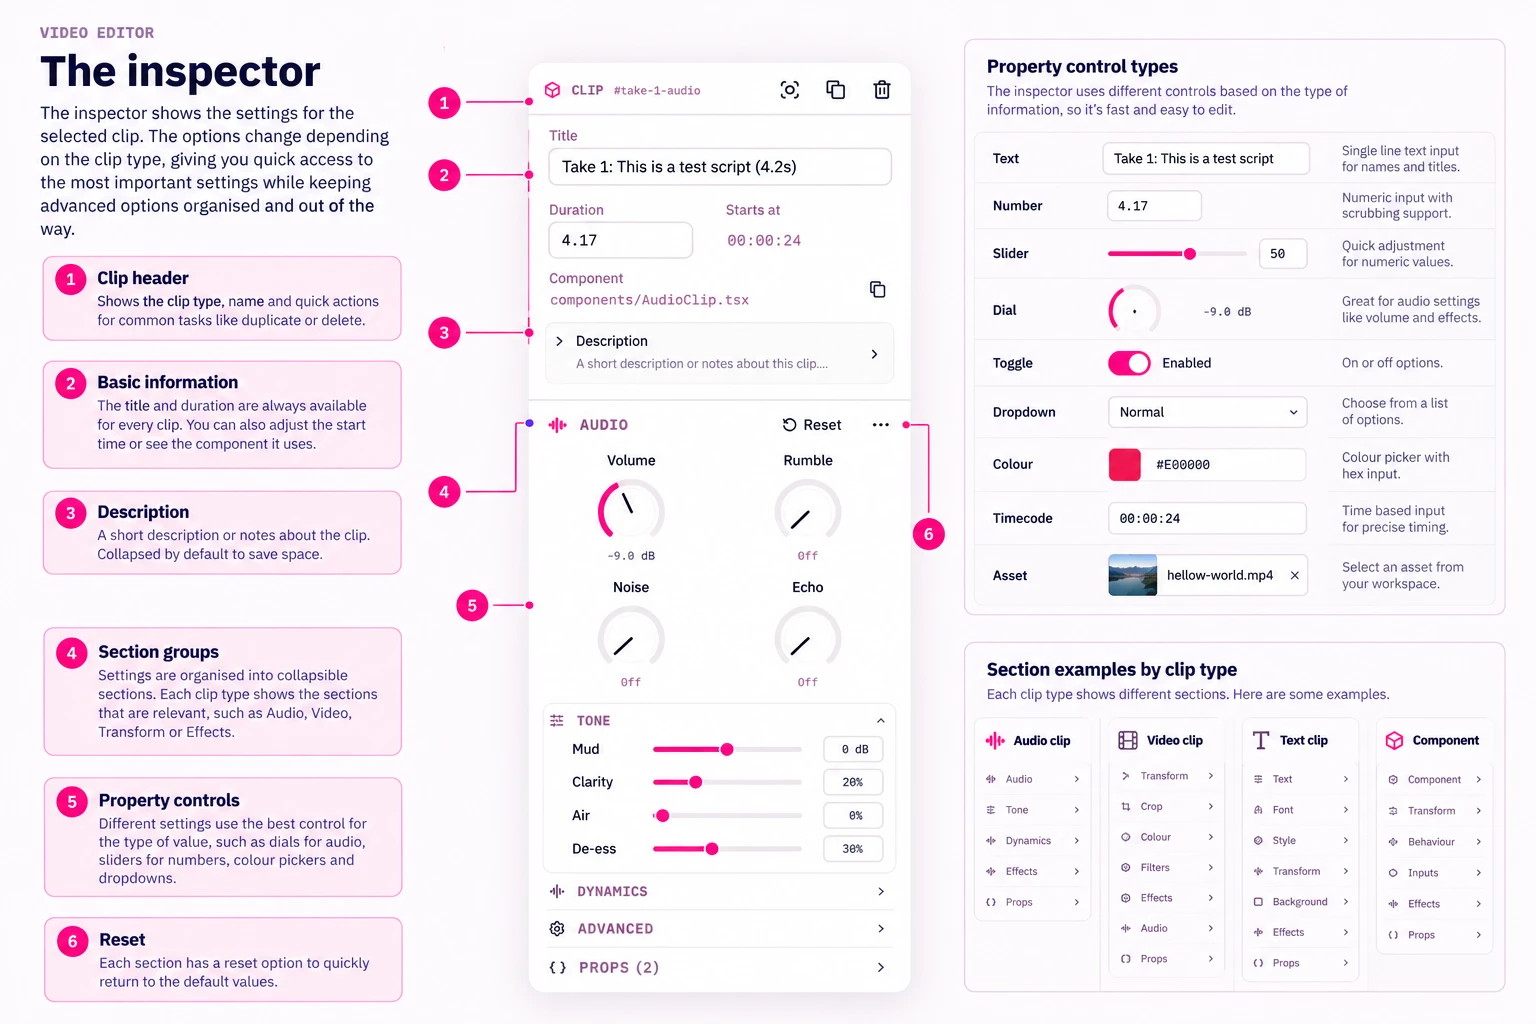
Select a clip and this panel shows its settings. What you see depends on the type of clip, so the important settings stay near the top and the advanced ones stay folded away.
Clip header
The clip type and its name, plus quick actions such as duplicate and delete. It stays put while you scroll the settings below.
Basic information
Every clip has a title and a duration. You can also set when it starts, and see which component it uses.
Description
A short note about the clip. It's collapsed by default, so the settings underneath stay within reach.
Section groups
Settings are grouped into sections you can open and close, such as Audio, Tone, Dynamics and Advanced. Each clip type shows only the sections that apply to it.
Property controls
The fields inside a section. A volume is a dial, an amount is often a slider, and a title is a line of text. The full set is just below.
Reset
Each section can return to its default values in one click, from the reset control in that section's header.
Property controls
Each setting gets the control that suits the value. These are the ones the inspector uses.
- Text
- A single line, for names and titles.
- Number
- A numeric field. Drag across it to scrub the value up or down.
- Slider
- A horizontal drag for an amount, such as how strong an effect is.
- Dial
- A rotary control, used for levels such as volume.
- Toggle
- On or off, for a setting that is either applied or it isn't.
- Dropdown
- One choice from a fixed list.
- Colour
- A swatch and a hex value.
- Timecode
- A precise time, for a start point or a duration.
- Asset
- A file from the workspace, such as a piece of footage, shown with a small preview.
Sections by clip type
Swap the selected clip and the section list changes with it. Anything that doesn't apply is left out.
Audio
Audio, Tone, Dynamics and Effects. Volume and the dials live in Audio. Mud, Air and De-ess live in Tone.
Video
Transform, Crop and Colour, then Filters and Effects. A video clip with sound also gets an Audio section.
Text
Text, Font, Style and Background, with Transform and Effects when you need to place the title or finish it.
Component
The inputs its author made editable, under Props, plus Behaviour, Transform and Effects.
Talking about the app
These names are the ones the assistant understands too. Asking it to "move the second clip on the Graphics track to the playhead" or "fix everything in Problems" lands in the right place.
More from the blog
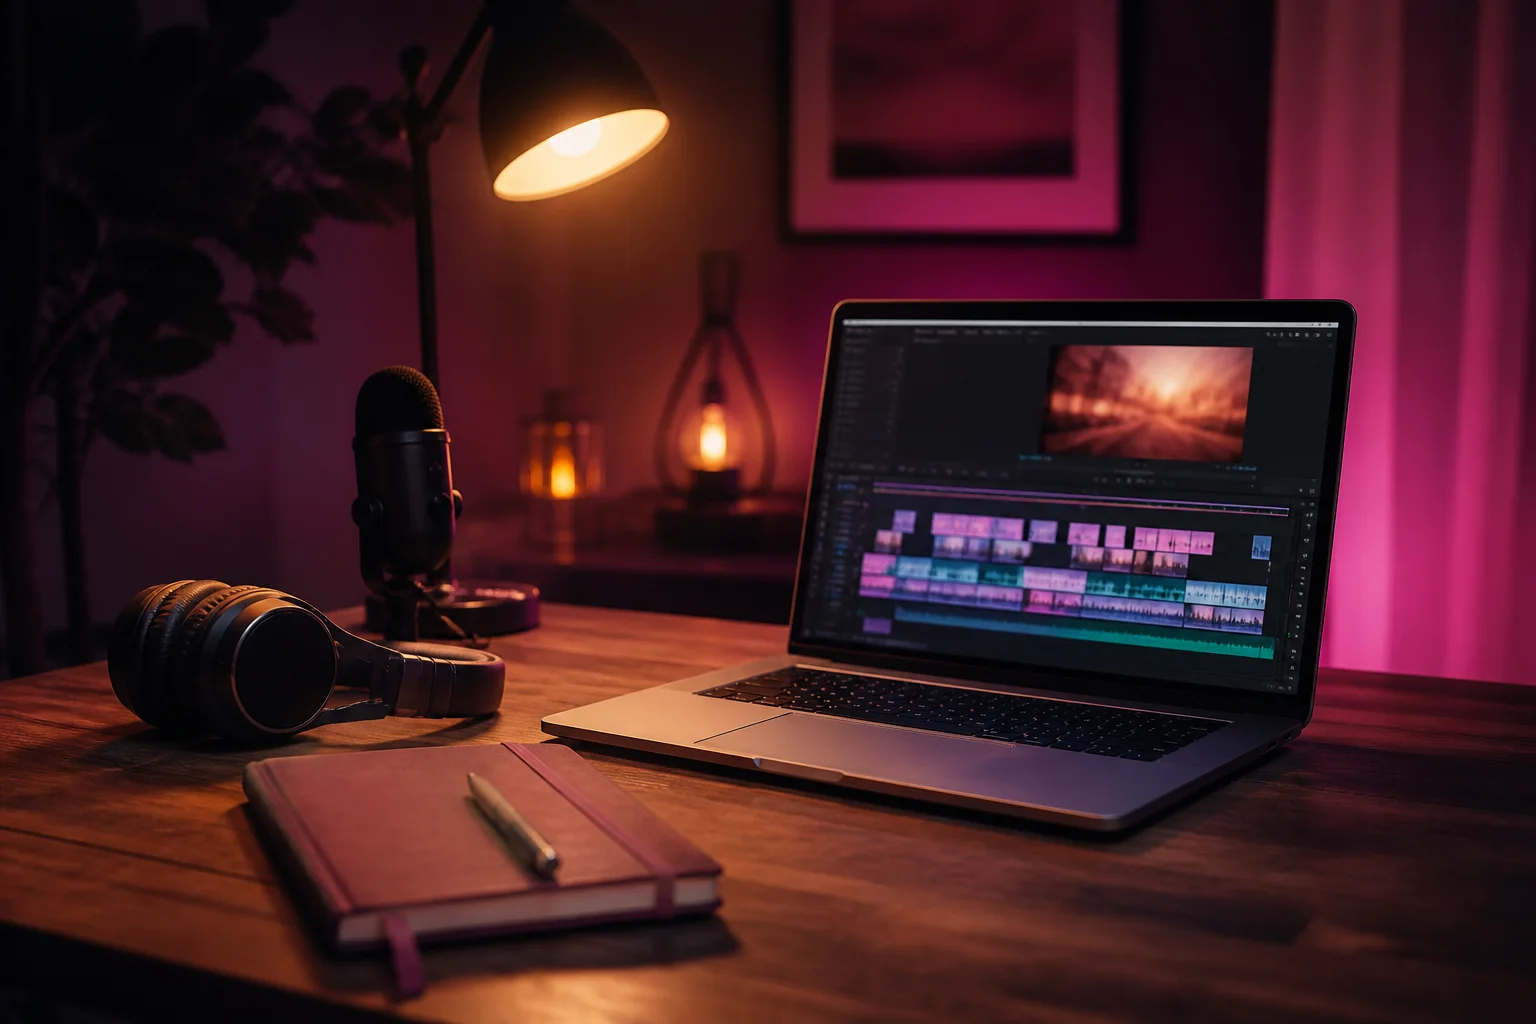
How many credits does a 10-minute video use?
A friendly walk-through of what a narrated 10-minute video costs in credits, from the brief to the last sound effect.
 First Take team
9 Oct 2026 · 5 min read
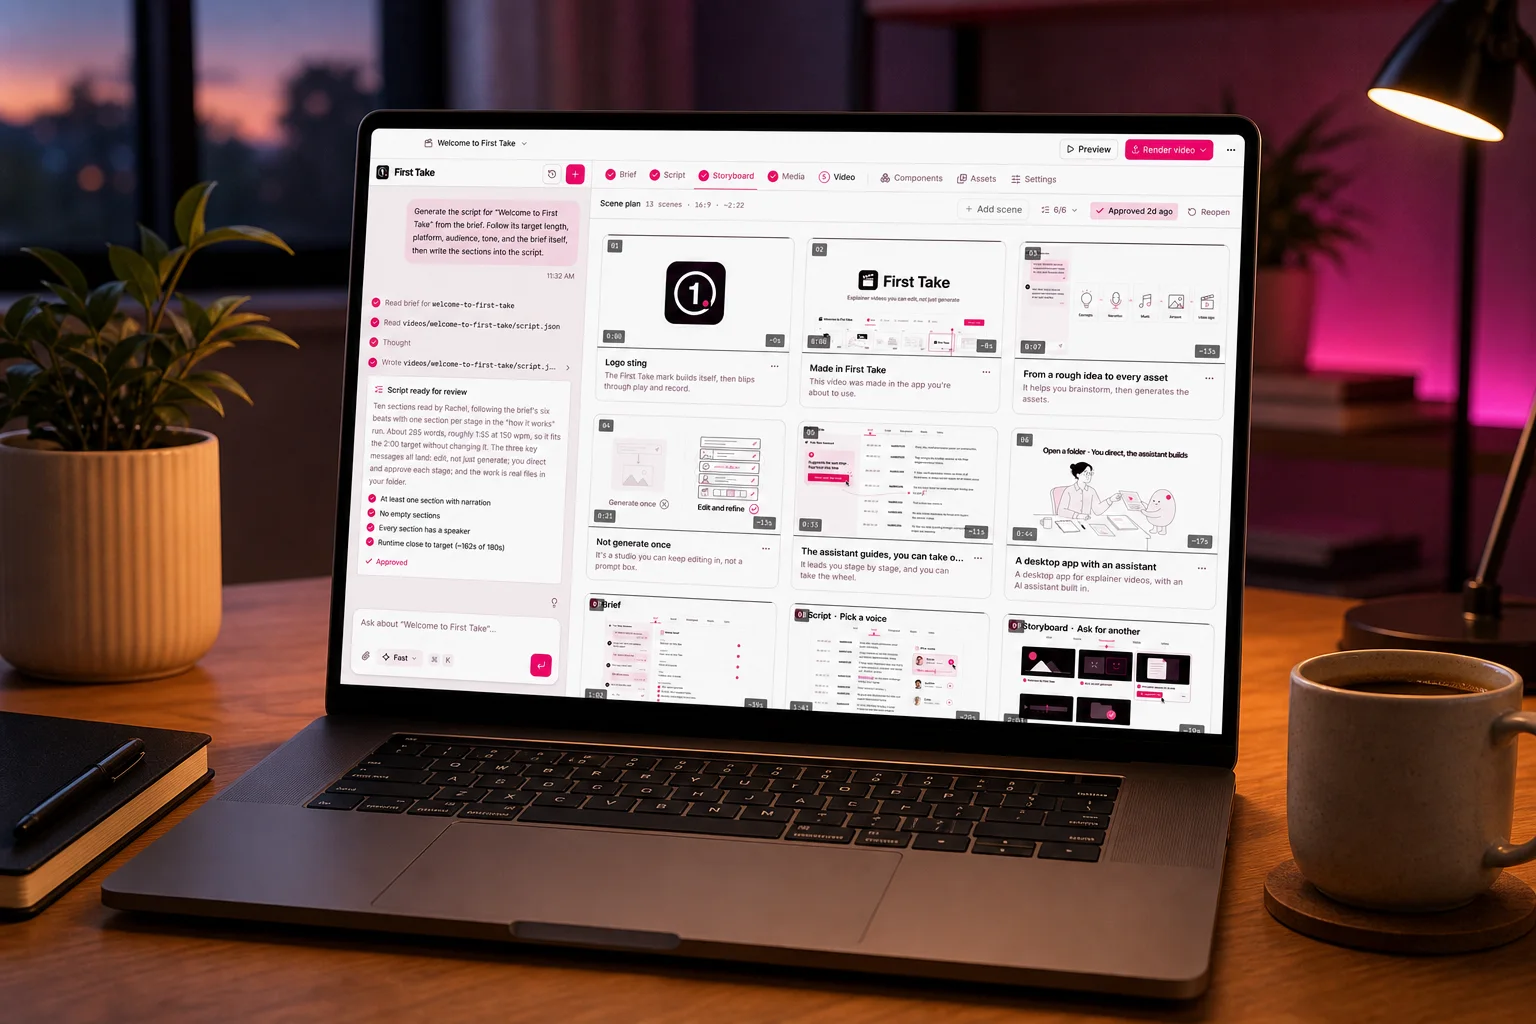
How to make a professional explainer video with AI in an afternoon
A step-by-step guide to going from a rough idea to a finished, narrated video: brief, script, storyboard, media and edit.
First Take team6 Oct 2026 · 7 min read