Tutorials
How to make a professional explainer video with AI in an afternoon
A step-by-step guide to going from a rough idea to a finished, narrated video: brief, script, storyboard, media and edit.
First Take team · 6 Oct 2026 · 7 min read
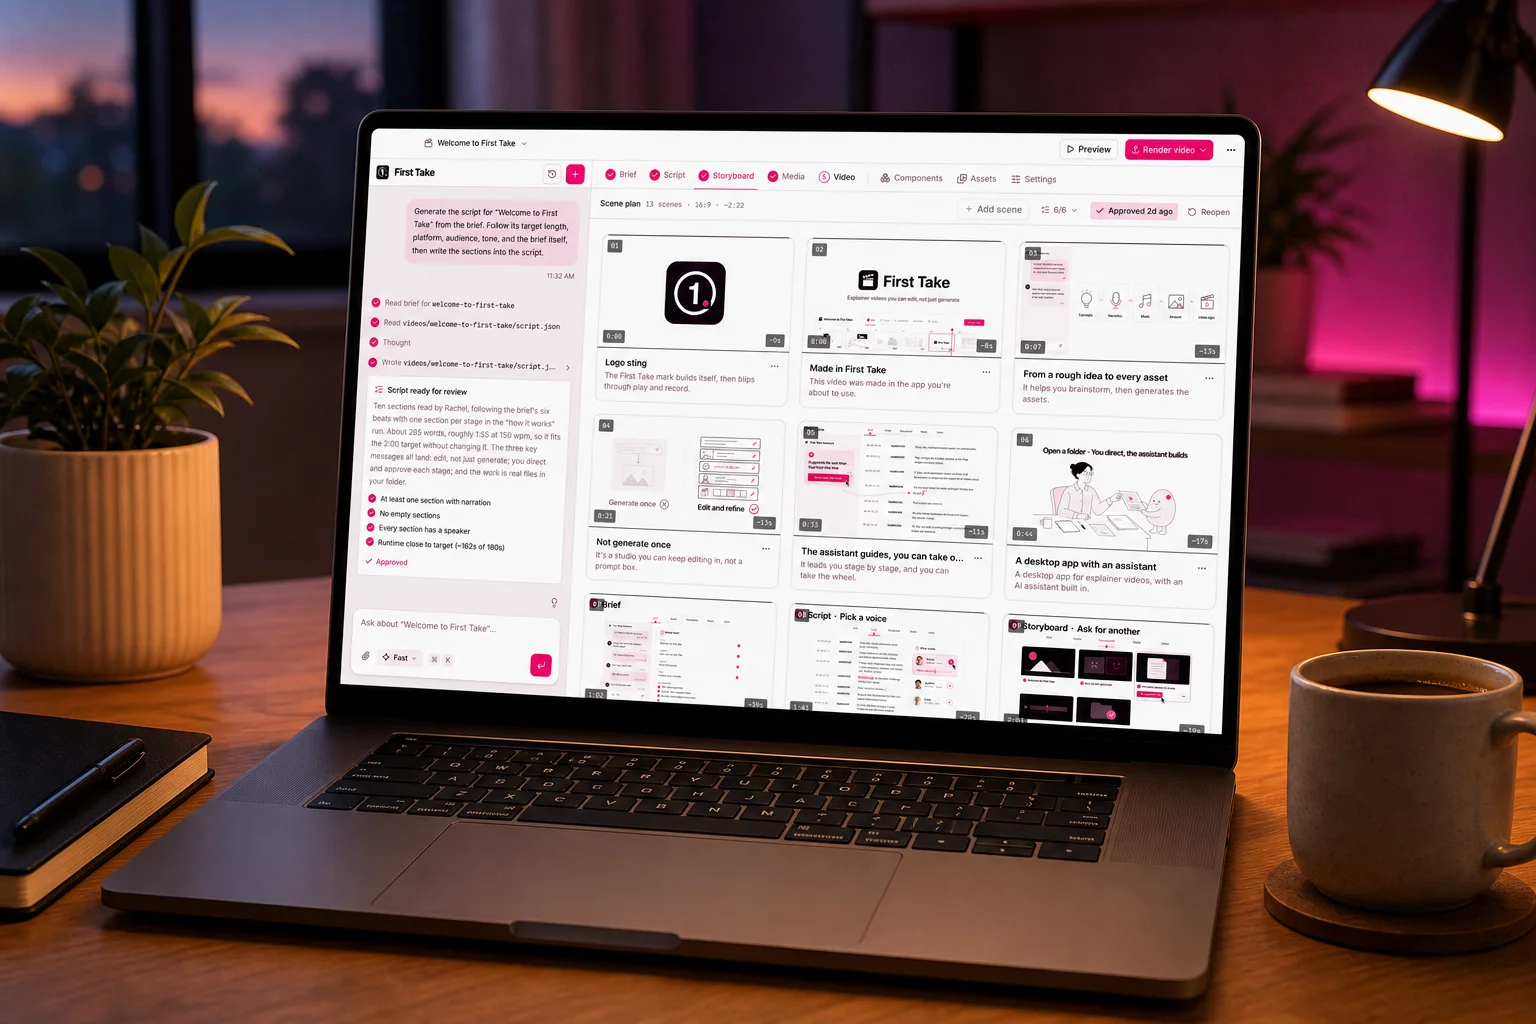
Most AI video tools give you one shot: type a prompt, wait, and take what comes out. That works for a quick clip, but an explainer has to be right. The words need to be accurate, the visuals need to match what's being said, and you need to be able to change one scene without regenerating everything else.
First Take works in five stages instead. You approve each one before the next unlocks, and every stage is real files in a folder on your Mac, so nothing is ever locked inside a single generation. Here's how a typical afternoon goes.
1. Start with a brief
Open a folder, create a video and describe it to the assistant in plain words: who it's for, what they should understand by the end, roughly how long it should be and where it will be watched. If you're not sure yet, talk it through. The assistant asks questions and shapes the idea with you.
The brief ends up with a target length, the formats you need (16:9, 9:16 or both), the audience, the tone and the key messages. Everything after this is checked against it.
2. Generate the script
The assistant writes the narration section by section and checks it against the brief: does every section have a speaker, and is the runtime close to the target? You can edit any line yourself, or ask for a pass in a particular direction, such as "make it sound more conversational" or "add a line about pricing".
Pick a voice for each speaker from the voice library, or record the narration yourself and First Take transcribes it into the script with word-level timing.
3. See it as a storyboard
Before anything is built, the script is split into scenes, one idea per spoken beat, and each scene gets a frame. This is the cheapest place to change your mind: if a frame isn't right, ask for another or describe what you want instead.
4. Create the media
Narration, images, music, sound effects and short video clips are generated for each scene, or you drop in your own. Each asset shows whether it's pending or ready, and anything can be regenerated on its own.
5. Edit and export
The assistant assembles the scenes onto a timeline with the narration, captions and music. From here it's an editor: trim a clip, change a scene's text or timing, move things between tracks, and preview the result. When it's right, render an MP4 in each format you need.
What makes the difference
- Approve each stage before moving on, so mistakes are caught when they're cheap to fix.
- Keep the brief honest. If the video needs to grow, update the target length rather than squeezing the script.
- Use the storyboard to agree the visuals before generating media.
- Everything is a file in your folder, so you can come back next month and change one scene.
The welcome video on our homepage was made exactly this way, in First Take. Watch it to see each stage in action.
More from the blog
10 prompting tips for better results from AI video
Simple habits that get you clearer scripts, more consistent visuals and fewer do-overs from the assistant.
 First Take team
6 Oct 2026 · 6 min read
How to create product demo videos that convert
Turn your product into a clear, engaging demo: what to show, what to leave out, and how to structure it.
First Take team6 Oct 2026 · 6 min read